TOP 5 BEST VEGETABLES TO GROW IN AN INDOOR GARDEN!
Are you missing your garden?? If you’re a garden lover like we are, and don’t have the benefit of living in a warm climate year round, you are probably missing your home-grown veggies. [And, hating that you now have to pay for fresh produce at the grocery store – a real bummer!]
SOLUTION–Try an indoor garden this winter!! Containers can be easily moved outside in the spring after the last frost and you’ll have a leg up on your neighbors too with full grown tomato vines in April!
WHAT You Will Need
Containers, potting soil, water, and a sunny spot (preferably southern facing windows for optimal light) are all that are needed for an indoor garden. Try to keep soil moist but avoid overwatering by using containers with drip holes and trays to collect any access. [TIP: If you leave town for an extended timeframe, drip trays can be filled with water for soil to slowly absorb and remain moist.]
WHERE You Should Grow
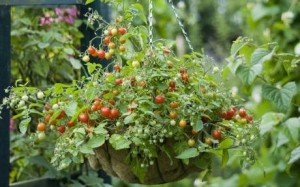
Windowsills are perfect for small herb pots but put heavy containers on the floor or firm stands. Some trailing vegetable species can also be decorative in hanging baskets fitted with drip trays and mushrooms can be grown in a closet or cupboard.
HOW To Get Started
Here are our Top 5 picks from gardening experts at All-Season Guide to Gardening, care2, and Better Homes and Gardens:
TOMATOES
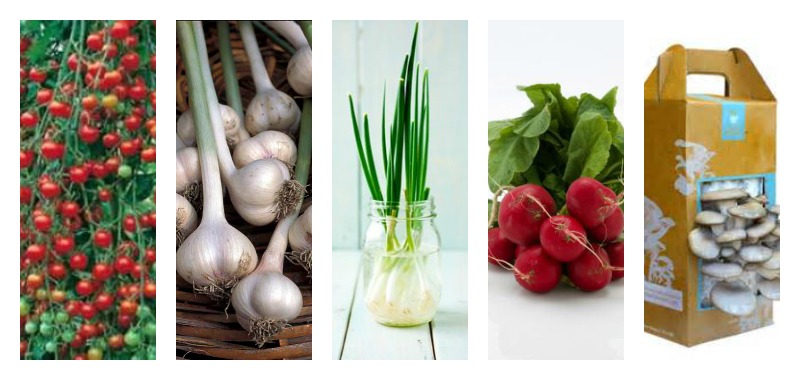
These little favorites can be grown easily, from seed or small plants, in a variety of containers. For windowsills and hanging baskets, pendent varieties are best such as Hundreds and Thousands tomatoes.
Sweet Million can be trained to grow up string or support posts and will produce long trusses of delicious and decorative fruit for several months. Patio, Pixie, Roma, Small Fry, Tiny Tim and Whippersnapper are all excellent choices for an indoor garden. Growing tomatoes indoors will most likely not be as productive but you’ll still have plenty to enjoy in the off-season. [TIP: Turn the containers occasionally so the entire plant gets light exposure.]
GARLIC
If you’ve left a few cloves (the sections of the bulb) in your refrigerator too long, they’ll start the indoor growing process for you. So easy! Separate the bulb’s cloves (the bigger, the better) and plant each in potting soil with the pointed end up about 2 inches below the surface and 4 inches apart. Keep soil moist in a well-drained container and place in a sunny spot with 6+ hours of light exposure and ample air circulation.
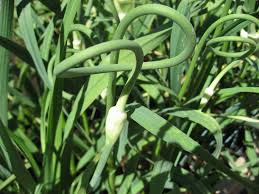
Chive-like shoots will appear in 4 to 8 weeks and should be cut at the base when flowery tops (called scapes) appear to allow all the energy to go to producing bigger bulbs (not flowers). [TIP: These can be used in pesto sauce, dip, soup, salad, etc. for a mild garlic flavor.]
GREEN ONIONS
Our best pick for beginners and those with a brown-thumb. You can’t mess this one up! Buy some fresh green onions (preferably organic) at the grocery store and place the bulb in a jar with one inch of water. Fill the jar when the water is low and cut as needed. Plant in a pot with soil if you want to extend their life, keep the soil moist, and provide lots of sun (6+ hours).
RADISHES
 Another great pick for the novice gardener, radishes are easy to grow and ready to eat in just a few weeks. Round and globe varieties are recommended due to their shorter roots. Try Cherry Belle for the quickest maturity and enjoyable, mild flavor. Place the root in a wide (at least 10 inches) pot with soil and add water. Again, a southern facing window is best for optimal sunlight (6+ hours) but move them out of the direct sun on hot days.
Want something more challenging?
MUSHROOMS
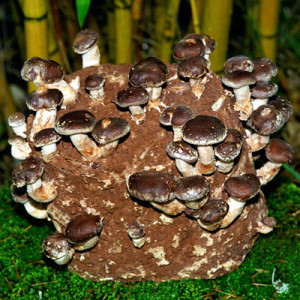
Try growing mushrooms! They need dark, cool, moist, and humid growing conditions so basements, garages, closets, even cupboards can be ideal growing spots during the winter.
What’s so ‘challenging’ about that? Mushrooms grow from spores (not seeds) so they do not contain the necessary substance (i.e. chlorophyll) to begin germination. Therefore, you’ll need to add sawdust, coffee grounds, grain, straw, wood chips, or liquid to the soil, depending on the type of mushroom, in order to create “spawn”. Button mushrooms are recommended as one of the easiest to grow.
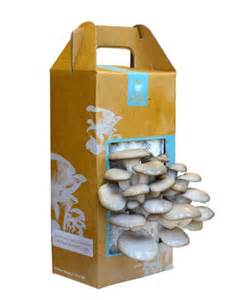
However, mushroom growing kits of many varieties can be purchased to provide the necessary ‘ingredients’ for an ideal growing environment.
Back to the Roots and Territorial Seed Company offer organic options including Oyster, Shiitake, and others.
HOW TO GROW
You’ll need to research the best method for growing based on your selection but if you choose Button mushrooms, here’s an easy summary of the necessary steps:
- Use a tray or pot 6 to 8 inches deep and no more than 16 inches wide.
- Fill the tray with compost and mix with spawn.
- Keep the soil temperature around 70 degrees F until you see the mycelium (tiny, white, threadlike roots) that typically appear after 3 weeks.
- Move the tray to a cooler location (55 to 60 degrees) and cover the spawn with an inch of potting soil.
- Keep the soil moist at all times by spraying with water initially and cover with a damp cloth. Then, regularly spray cloth so it remains damp.
- Mushrooms should appear within 3 to 4 weeks! Harvest when the caps open and cut from the stem rather than pulling up the mushrooms which can damage the surrounding developing fungi.
[TIP: Frequent harvesting promotes growth for the developing fungi which should result in a continuous crop for about six months according to Better Homes and Gardens.] Click here for more details.
Have you had success with an indoor garden? Please let us know what has grown best for you and any helpful tips!
______________________________________________________________________________________________________
CONNECT WITH US —
Please like/follow us on social media links below to support a Made in USA, healthy-lifestyle company that is ‘Fighting for a Greener Planet’ to make a differnce! Thanks friends!!
Sign up here at www.koecolife.com and receive valuable coupons, tips, & product updates. And, follow us @koecolife on ![]()
![]()
![]() for our latest news and events too. Go YOU!
for our latest news and events too. Go YOU!
Post originally published on 12/9/14.


